With visions of Fzx alive in their heads
When down in the basement there arose such a clatter
The sound amplified by the big radiator
Down twenty eight stairs I flew like The Flash
Preventing the house from turning to ash
Off with the switch, the silence was deep
No more big noises, BabyGirl still asleep
The furnace was installed around 1980. Maybe before that. It might even be older than I.
I've cleaned it and fixed a few problems but it still runs fine so I'm not replacing it until it dies. It's a hot water system with huge radiators like these - every one a different size.
The problem, I knew immediately, was the electric motor running the water pump. I had "fixed" the problem a few years before on a cold weekend when the same thing happened. My "fix" was a small spring from my random spring collection. This time I wanted to do it right so I turned off the furnace, started up three space heaters, and went back to bed - it was 3:30 am.
Motor at right, pump at left, coupler in the cone between
I took the motor off this time rather than fishing pieces out and in with needle nose pliers. It went a lot better.
broken springs from the coupler
After a visit to the doctor for a hacking cough, I visited Sauer Brothers on Rt 8 with the motor in a box and picked up the new parts.
a $30 fix
Since the water pump requires very little torque, it is coupled to the motor with springs. One half of this assembly is attached to the motor and the other half to the pump. This system also limits problems from motor/shaft misalignment.
coupler
You can see the set screws that hold the coupler to the shafts in the picture below
set screws
and here is the depression in the pump shaft that receives the set screw.
pump housing, shaft, and set screw depression
It was a tricky process, but Sauer recommended that I attach the motor half first. Then, while holding everything in position with one hand I attached the pump half and completed the replacement.
Wrench, ratchet and hex key. That's all it took. $30 and a few hours
While we're here, let's take a tour. Like your hot water tank, your furnace has specifications and warnings and instructions affixed to it.
instructions and specifications
This is the main valve assembly. The small tube to the left runs the natural gas to the pilot light. The line entering at the top is a thermocouple in the pilot light that must be hot or the pilot valve will shut off - safety. The big pipe to the left is the main gas pipe controlled by the thermostat on your wall.
valve housing for pilot light and main gas input
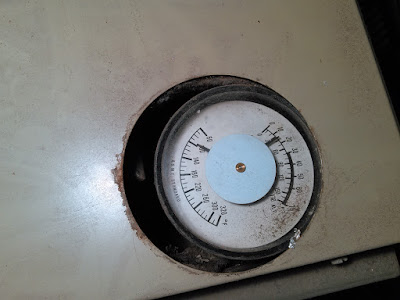
It has gauges on the top for temperature and pressure.
temperature and pressure indicators
This temperature switch turns the motor on to pump the water once it reaches a high enough temperature inside the furnace. It'll draw in cold water from the rest of the closed system, shut off, heat the cold water, and repeat the cycle until all the water in the radiators are heating the house.
motor/pump controller
And here is our motor and pump. Inside that horizontal cone was the problem.
motor and pump for circulation
The gas valve stays open until the house thermostat tells it to turn off. Then the hot radiators continue to heat the house for sometimes an hour after it turns off. I have to step up the temperature two or three degrees per hour or it'll overheat.
By noon I had it all back together and the house temperature had stayed around 60 with the space heaters on. Just $30 and a few hours of work. It's all clean and I now understand more about the whole system.
#DIY4ever


It makes me really happy when problems that seem huge and expensive can be solved inexpensively with a few hours worth of work. There are times when a professional is needed but in this instance, you handled it beautifully and learned a lot about your unit in the process! Nicely done!
ReplyDeleteJodi Bennett @ Marsh Heating
Thank you. It took some time to fix but I learned something and took my students on a tour of the function of a furnace.
Delete